Directions
Step 1 – Drain Chickpeas
Start off by opening up 1 can of chickpeas and draining through a strainer to ensure there aren’t any bits of actual chickpeas in the liquid. I suggest using a 540ml can. Transfer the liquid into a stand mixer with preferably a whisk attachment but, if you don’t have that and only the paddle attachment like I do, it will work but take a little longer to whip.
Step 2 – Add Cream of Tartar
Sprinkle the cream of tartar along the top of the aquafaba, taking care that it is well distributed. Pouring it all in at once will make it clump and therefore won’t ensure proper even stabilization of your meringue. Gradually turn your mixer to it’s highest setting, step by step as the aquafaba starts to thicken. (Don’t do that right away or it will splatter everywhere!)
Step 3 – Add Sugar
Once the mixture resembles a soft meringue, gradually add the sugar in, sprinkling about 2 tablespoons at a time until completely added in. Sprinkle in some vanilla bean powder (if you have it) and some vanilla extract to add flavour.
Step 4 – Spoon onto Parchment
Once meringue is glossy and thick, use a tablespoon or a medium sized cookie scoop to spoon a dollop onto a pan lined with parchment paper. Use the backside of a spoon to smooth and create a “nest” like meringue. This recipe will make about 12.
Step 5 – Bake
Preheat oven to 200*F and adjust racks to the middle/top section of the oven. Bake trays for about 2 hours or until crispy to the touch. Turn off oven and leave trays in allowing them to cool along with the oven.
Step 6 – Plate
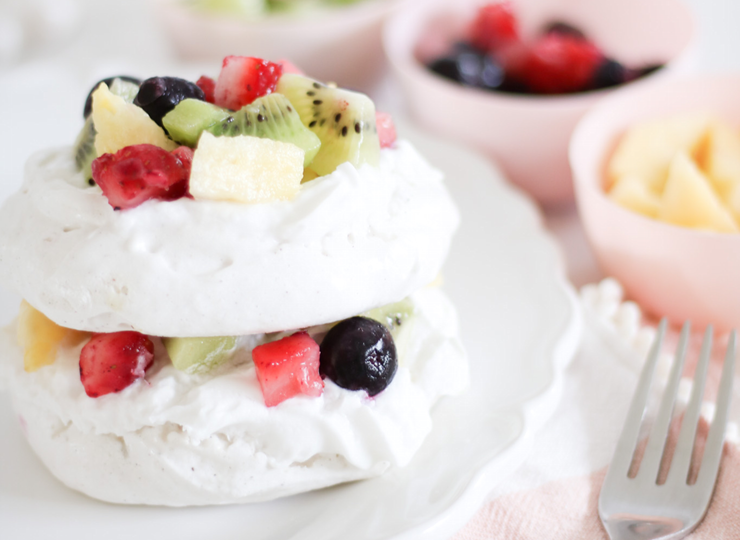
Start with one pavlova nest in the centre of the plate. Place a dollop of coconut whip into the centre of the nest and spoon fresh fruit on top. Add another pavlova and repeat. Serve immediately. Keep any remaining pavlova’s in an air tight container for up to 7 days. If they begin to get sticky, simply bake them in the oven again at 200*F until they dry out.
This recipe courtesy of The Cake Mama. Visit her site for more great vegan recipes.
